Guide
How to Clean a Dry Herb Vaporizer (The Complete Step-by-Step Guide)
21 July 2026 • 7 min read (Updated 9 September 2026)
Learn how to clean a dry herb vaporizer the right way, from a quick post-session brush-out to a deep isopropyl soak, so your vape tastes better and lasts longer.
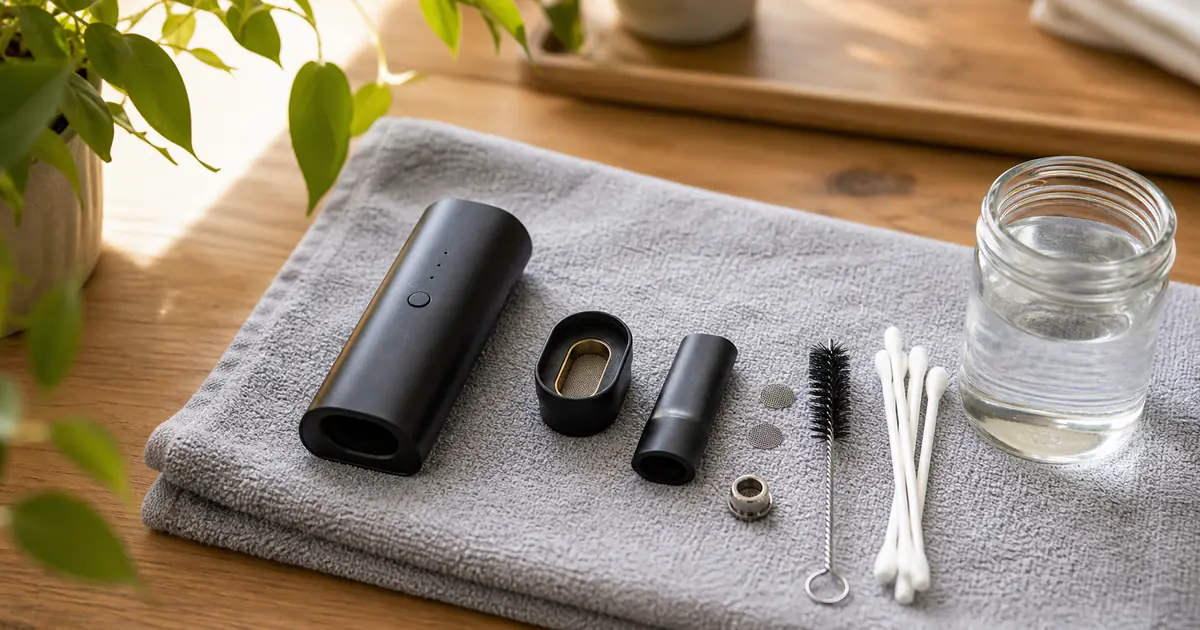
A clean vaporizer tastes better, hits smoother, and lasts far longer than a neglected one. Cleaning is still the most skipped part of owning a dry herb vape. Every session leaves resin and fine plant dust in the chamber, the vapor path, and the mouthpiece, and that build-up is what slowly turns a crisp, flavorful draw into a harsh, muddy one. Keeping a device fresh only takes a few minutes once you know the routine. This guide covers how to clean a dry herb vaporizer properly, how often it actually needs doing, and the small habits that make maintenance painless.
Contents9 sections
Why Cleaning Your Vaporizer Matters
Every session leaves behind two kinds of gunk: loose, already vaped material and sticky resin from the essential oils and terpenes in your flower. Loose material clogs airflow and dulls flavor almost immediately, while resin slowly bakes onto hot surfaces and gets harder to shift the longer it sits. That resin is essentially concentrated plant extract, which raises a common question of whether you can vape concentrates in a dry herb vaporizer instead of just scraping it away. A clogged device heats unevenly, draws with more resistance, and sometimes stops producing decent vapor at all. It's one of the most common reasons people decide their vape has died when it just needs a wipe down.
Regular cleaning also protects flavor. If you care about tasting the difference between strains, a clean vapor path isn't optional, which is why owners of the best vaporizers for flavor chasers tend to clean far more often than average. Think of it like a good coffee grinder: yesterday's residue changes today's taste.
What You Will Need
You don't need a specialist kit. Most of this is already in your kitchen or bathroom:
- Isopropyl alcohol (90 percent or higher works best for resin)
- Cotton swabs and pipe cleaners
- A small, soft cleaning brush (many vapes ship with one)
- Warm water and a little dish soap for removable glass or steel parts
- A microfiber or lint-free cloth
- A small bowl or sealable bag for soaking parts
- Optional: coarse salt to add scrubbing action to alcohol soaks
Warning: Check your manufacturer's guidance before anything else, since some screens, seals, and plastic parts should never see alcohol, and a few devices use coatings that solvents will strip.
The Quick Clean (After Every Session)
The most valuable habit you can build takes under a minute. Once the chamber has cooled enough to handle but still feels warm, empty the already vaped bud and brush out the chamber. Warm residue lifts away easily; cooled residue cements itself in place. Tip out the loose debris, give the chamber a few passes with the brush, and run a dry cotton swab around the mouthpiece.
This one habit prevents most build-up problems before they start. Knowing when it's time to refill or empty your vaporizer and brushing out the chamber at the same moment keeps flavor consistently fresh, and you'll need far fewer deep cleans because of it.
The Deep Clean (Every One to Two Weeks)
The deep clean is where the isopropyl alcohol comes in. How often you need one depends on how heavily you use your device, but every one to two weeks is a sensible baseline for daily users.
- Disassemble the device. Remove the mouthpiece, any cooling unit, screens, and the chamber components according to your manual. Lay the parts out in order so reassembly is obvious.
- Soak the safe parts. Place alcohol-safe glass, steel, and ceramic parts in a bowl or sealable bag with isopropyl alcohol. Ten to thirty minutes dissolves most resin. For stubborn build-up, add a pinch of coarse salt and shake the bag gently so the salt scrubs for you.
- Swab the chamber and vapor path. Don't pour alcohol into the heating chamber of an electronic vaporizer unless the manufacturer explicitly says it's fine. Dampen a cotton swab instead (damp, not dripping) and work it around the chamber walls and airpath. Pipe cleaners are ideal for narrow vapor channels.
- Rinse thoroughly. Rinse soaked parts under warm water until the alcohol smell is completely gone. Any solvent left behind will taint your next session.
- Dry completely. Let everything air dry before reassembly. Trapped alcohol or water is the fastest way to kill a heating element. Give it at least an hour, longer for anything with seals.
Warning: Trapped alcohol or water left inside your vaporizer is the fastest way to kill a heating element, so let everything air dry completely, longer if it has seals, before you reassemble it.
If your device uses a water pipe adapter, clean that glass on the same schedule. It collects resin just as quickly as the device itself.
Cleaning Conduction vs Convection Vaporizers
Heating style changes where the residue ends up, so it helps to know which type you own. In a conduction device the herb sits directly against a hot chamber wall, so resin bakes onto that surface and the chamber needs the most attention. In a convection vaporizer the hot air passes through the material, so residue tends to gather further along the vapor path and in the mouthpiece. If you're not sure which you have, our guide on convection vs conduction vaporizers explains the difference and what it means for upkeep. Hybrid models, including premium options like the Mighty+ and Venty, collect residue in both places, so give the chamber and the cooling unit equal attention.
How Often Should You Clean a Dry Herb Vaporizer?
A simple rhythm works for almost everyone:
- After every session: brush the chamber and empty spent material while still warm.
- Every few sessions: swab the mouthpiece and vapor path.
- Every one to two weeks: full deep clean with an alcohol soak for removable parts.
- Monthly: inspect screens and seals, and replace any that are worn or warped.
Heavy users, especially owners of devices built for heavy use, should lean toward the shorter end of each range. And if keeping up with all this sounds like a chore, it's worth shopping from the best easy-to-clean vaporizers, which are designed around removable, dishwasher-friendly, or tool-free parts.
Mistakes to Avoid
- Soaking electronics. Never submerge the body of an electronic vaporizer. Only soak the parts your manual confirms are safe.
- Using low-strength alcohol. Anything below 90 percent leaves more water behind and cuts through resin less effectively.
- Reassembling while wet. Trapped moisture damages heaters and can cause a burnt taste or a short.
- Letting resin harden. The longer you wait, the harder the job. A warm brush-out now saves a long soak later.
- Scrubbing delicate screens with metal. Use a soft brush or a swab so you don't deform the fine mesh.
Tip: Warm residue lifts away far more easily than resin that has been left to cool and harden, so a quick brush-out right after your session saves you a much longer soak later.
Frequently Asked Questions
Can I clean my vaporizer with water alone? Water shifts loose debris but won't touch resin. Use warm soapy water for removable glass and steel parts, and save the isopropyl alcohol for the sticky build-up.
What is the best thing to clean a dry herb vaporizer with? Isopropyl alcohol at 90 percent or higher is the standard for dissolving resin, paired with cotton swabs, pipe cleaners, and a soft brush. Coarse salt added to an alcohol soak helps with stubborn build-up.
How do I get the burnt taste out of my vaporizer? A burnt or harsh taste almost always means it's time to clean. Empty and brush the chamber, swab the vapor path, and deep clean the removable parts. If the taste persists on a brand new device, it may still need the seasoning or break-in process.
Will cleaning make my vaporizer last longer? Yes. Clean airflow reduces strain on the heater and battery, prevents clogs, and keeps seals working, all of which extend the life of the device.
Keep It Fresh
There's no trick to cleaning a dry herb vaporizer, just consistency. A warm brush-out after every session plus a deep clean every week or two keeps flavor sharp, airflow open, and your investment running for years. If you're still choosing a device and want upkeep to be as painless as possible, start with the best easy-to-clean vaporizers or browse our full device finder to find a model that fits how much maintenance you'll honestly do.
About the author
Practical context from the editor behind this guide.